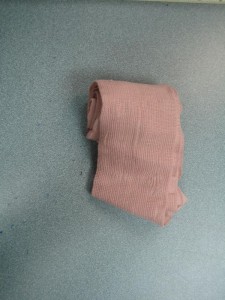
Because of the various shapes and sizes of the body, there are different ways to make roller bandage for specific parts of the body, such as arm, knee and hand.
The body is composed of many different shapes and sizes, thus there are different procedures to make a roller bandage for different parts of the body. In this article, it will be discussed how to make a roller bandage for particular parts of the body, such as the lower arm or leg. A roller bandage is used to keep dressings in place, to support an injured limb or joint, and to apply or maintain pressure over a particular part of the body.
How to Make a Roller Bandage for the Lower Arm or Leg
The lower arm and leg are composed of long bones, thus it is relatively easier to make a roller bandage for these areas of the body in case they are injured. To successfully make a roller bandage for the lower arm or leg, follow these steps meticulously.
- Apply a padding or dressing totally over the affected area.
- Begin with a diagonal, locking turn below the dressing or padding to keep the dressing in place.
- Work up the limb, ensuring that two-thirds of each preceding turn are covered.
- To end the roller bandaging, finish with a straight turn at the end of the bandage.
- Secure the bandage by fastening with a safety pin or adhesive tape.
How to Make a Roller Bandage for the Elbow or Knee
The elbow and knee are joints that allow the body for a full range of motion thus the roller bandage for these areas will need a particular procedure that is used to most joints in the body. To successfully make a roller bandage for the elbow or knee, these steps are advised.
- Apply a padding or dressing totally over the affected area.
- Begin with a full turn over the point of the elbow or knee to safeguard the bandage.
- Follow a second turn just below the initial, exposing one-third of the first turn over the point of the elbow or knee.
- Follow a third turn just above the initial, exposing one-third of the first turn over the point of the elbow or knee.
- Work with one or two more turns that is alternately working from below to above the affected joint, until the dressing or padding is completely covered.
- It is necessary to avoid extra turns as it may cause pressure on the inside surface of the joint.
- To finish off, do a full turn above the elbow or knee.
- Secure the bandage by fastening with a safety pin or adhesive tape.
How to Make a Roller Bandage for the Hand or Foot
The procedure for roller bandage for the hand or foot is different from other parts of the body due to its different shape. The procedure to make a roller bandage for the hand or foot is as follows:
- Apply a padding or dressing totally over the affected area.
- Begin with a diagonal, locking turn around the wrist or foot.
- Carry the bandage across the back of the affected hand or foot to the base of the smallest digit and then make a complete turnaround the digits.
- Follow this with another turn across the back of the hand or foot from the fingers/ toes to the wrist/ ankle.
- Repeatedly do these working upwards with each turn until the dressing or padding is completely covered.
- To finish the roller bandage for the hand or foot, do a circular turn around the wrist ankle.
- Secure the bandage by fastening with a safety pin or adhesive tape.
Disclaimer: The information from this article does not provide medical

advice and should not be substituted for formal training. Seek medical attention when necessary. To learn more about to how to make a roller bandage for specific parts of the body and other types of bandages, enrol in First Aid Courses and CPR Courses with St Mark James Training.
Online Sources:
http://www.stjohn.org.nz/en/First-Aid/First-Aid-Library/Immediate-First-Aid1/Dressings-and-Bandages/